HOW TO RAISE BRINE SHRIMP

Why Live Brine Shrimp Belong in Your Aquarium Feeding Routine
Commercial flakes and micro-pellets provide basic nutrition, but they lack the natural hunting stimulation and fresh enzyme profiles found in live food. Newly hatched brine shrimp, known as nauplii, carry a rich yolk sac packed with essential fatty acids, protein, and amino acids that jumpstart fry development and enhance natural pigmentation in adult fish.
Live brine shrimp trigger predatory instincts in fish that often turn up their noses at dry diets. Finicky feeders, newly imported wild species, and delicate fry respond aggressively to the erratic swimming motion of live Artemia. Furthermore, live food does not pollute your water column nearly as fast as uneaten frozen foods or decaying flakes, giving your biological filter breathing room.
While buying frozen cubes is convenient, hatching and raising live brine shrimp at home gives you full control over their nutritional profile through a process called gut-loading. By feeding your live shrimp specialized microalgae, spirulina, or lipid supplements right before feeding them off, you can turn them into power-packed vitamin capsules tailored specifically to your tank's needs.
Essential Equipment for Hatching Brine Shrimp
Setting up a brine shrimp culture does not require expensive high-tech gear. In fact, most hobbyists can assemble a highly effective hatchery using simple items found around the house or at a local fish store. The basic mechanics rely on water movement, salinity, temperature control, and proper lighting to trigger high hatch rates.
To construct a basic DIY bottle hatcher, gather the following supplies:
- Two-Liter Plastic Soda Bottle: Inverted with the bottom cut off to create a funnel shape that prevents eggs from settling in dead corners.
- Air Pump and Rigid Tubing: An open air line (without an air stone) provides vigorous bubbling to keep cysts suspended in continuous motion.
- Marine Salt Mix or Non-Iodized Salt: Synthetic sea salt or plain aquarium salt creates the brackish environment required for hydration and hatching.
- Brine Shrimp Cysts: High-grade Artemia cysts with high hatch rates (90%+ yields the best results).
- Desk Lamp or LED Light: Light acts as a catalyst for hatching and helps concentrate hatched nauplii for easy harvesting.
If you prefer a cleaner aesthetic on your fish room shelf, pre-built inverted cone hatcheries are available commercially. However, whether you choose DIY or commercial equipment, maintaining steady aeration and a temperature between 78°F and 82°F is essential for achieving a full hatch within 24 to 36 hours.
Step-by-Step Guide to Hatching Baby Brine Shrimp (Nauplii)
Hatching brine shrimp cysts is a straightforward process when key water parameters are met consistently. Follow these steps to achieve maximum hatch rates without risking culture crashes.
First, prepare your hatching solution by mixing treated freshwater with marine salt. Aim for a specific gravity between 1.018 and 1.022 (roughly 1.5 to 2 tablespoons of salt per liter of water). Avoid using tap water containing heavy metals or chloramines without proper conditioning, as these chemical additives impair cyst wall breakdown.
Pour the salt solution into your inverted hatcher and connect your air line. Place the air tube all the way at the bottom of the cone so that bubbles rise continuously through the narrow point. Add approximately 1/2 teaspoon of brine shrimp cysts per liter of water. Ensure the bubble rate is strong enough to keep every single egg tumbling; if eggs collect along the walls or bottom, increase airflow.
Position a light source near the base of the hatcher and keep the temperature elevated at roughly 80°F. Within 18 to 24 hours, the cysts will hydrate, burst open, and release free-swimming orange nauplii. To harvest, turn off the air pump and let the container rest for 10 minutes. The unhatched cysts will sink to the bottom cone, empty egg shells will float to the surface, and the light-attracted baby shrimp will gather in the middle layer. Siphon the orange layer through a fine mesh brine shrimp net, rinse briefly with fresh water, and serve immediately to your fish.
Growing Brine Shrimp from Nauplii to Adults
While freshly hatched nauplii are ideal for tiny mouth sizes, growing brine shrimp to their full adult size (around 8 to 12 millimeters) offers substantial protein benefits for medium and large aquarium inhabitants. Moving from hatching to grow-out requires adjusting your husbandry routine to support long-term water stability.
Transfer your newly hatched nauplii into a larger container, such as a 5-gallon aquarium or clean plastic tub filled with brackish water (salinity around 1.020 to 1.026). Unlike the intense tumbling required during hatching, adult brine shrimp require gentle aeration. A heavy bubble stream will physically injure adult shrimp and disrupt their swimming ability; use a small valve to dial air flow down to a steady, soft bubble train.
Because brine shrimp are filter feeders, their digestive tracts absorb tiny particles suspended in the water column. You must wait roughly 24 hours post-hatching to feed them, as nauplii consume their internal yolk sac first. Once their mouth parts develop, feed them twice daily with micro-foods, including:
- Live Phytoplankton / Microalgae: The absolute cleanest food source for maintaining optimal water clarity and maximum nutritional value.
- Powdered Spirulina Algae: Inexpensive and rich in carotene, which boosts red and orange pigments in ornamental fish.
- Yeast and Fine Feed Soluble Powders: Active baker's yeast or specialized commercial dry feeds mixed thoroughly with warm water into a cloud.
The cardinal rule when growing adult brine shrimp is simple: never overfeed. Add only enough food to make the water slightly cloudy. Wait until the water clears completely before adding the next feed. Excess organic powder causes bacteria blooms, oxygen depletion, and total culture collapse within hours.
Compatibility and Feeding Considerations Across Fish Species
Live brine shrimp are accepted by almost all carnivores and omnivores, but target sizing makes a huge difference in feeding efficiency. Matching the right growth stage of Artemia to the target species prevents wasted food and ensures optimal caloric intake.
Freshly hatched baby brine shrimp are essential for raising tiny fry of egg-laying species, including Bettas, Killifish, Corydoras, and Rainbowfish. The movement encourages hunting behavior in shy fry that reject prepared micro-diets. Small schooling fish like Neon Tetras, Celestial Pearl Danios, and Guppies also thrive on daily feeds of baby brine shrimp, which easily fit into small mouths.
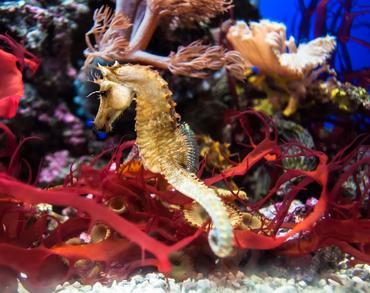
For adult community fish like Angelfish, German Blue Rams, Gouramis, and Dwarf Cichlids, sub-adult and full-grown live brine shrimp present a substantial meal. Marine aquarists will find that picky wild-caught livestock like Seahorses, Pipefish, Anthias, and Copperband Butterflies often rely on live adult brine shrimp as a transitioning food while acclimating to aquarium life.
When incorporating live food into your daily schedule, ensure you maintain overall tank water quality. To learn more about managing nitrogen buildup from intensive feeding, read our detailed guide on understanding the aquarium nitrogen cycle. Additionally, if you are culturing food specifically to raise young, explore our specialized overview on breeding freshwater fish for expert tips on conditioning parents and supporting developing fry.
Common Mistakes to Avoid When Culturing Artemia
Even experienced aquarists occasionally face crashed cultures. Identifying common failure points allows you to adjust parameters before losing an entire batch of live food.
One frequent mistake is using standard iodized table salt or water treated with water softeners. Table salt contains anticaking agents and iodine, both of which degrade hatch rates significantly. Always stick to pure sea salt mix, solar salt, or non-iodized aquarium salt.
Another common pitfall is harvesting unhatched cysts alongside free-swimming nauplii and dumping them directly into your main display tank. Fish cannot digest hard cyst shells. Swallowing empty shells or unhatched eggs can cause severe intestinal impaction in small fry. Taking extra care during siphon separation ensures only clean nauplii enter your tank.
Lastly, pay close attention to culture cleanliness. If you are maintaining continuous grow-out tubs, perform 20% water changes weekly using fresh brackish water to remove waste detritus. Over time, detritus buildup harbours harmful bacterial strains that lower dissolved oxygen levels. For broader maintenance insights to keep your feeding setup clean, check out our walkthrough on fish tank maintenance and cleaning.
Key Takeaways and Final Advice
Culturing live brine shrimp is one of the single most rewarding skills you can develop as an aquarium hobbyist. By supplying high-protein live nauplii to growing fry and gut-loaded adult brine shrimp to community display fish, you actively improve fish health, encourage natural hunting behaviors, and promote vibrant coloration.
Starting out requires minimal investment: an air pump, salt mix, quality cysts, and a simple soda-bottle hatchery will yield thousands of nutrient-rich meals within 24 hours. Keep your temperature steady, maintain gentle aeration during grow-out phases, and avoid overfeeding to enjoy a reliable, continuous food supply right at home.
Ready to elevate your fishkeeping experience? Try setting up your first batch of Artemia today, and explore our library of aquarium guides for more tips on feeding, breeding, and tank setup care!


MOST RECENT ARTICLES