UV STERILIZERS FOR REEF AQUARIUMS

How UV Sterilization Works in Saltwater Systems
Ultraviolet sterilization operates by exposing aquarium water to UV-C light, which typically operates at a wavelength between 200 and 280 nanometers (with 253.7 nanometers being the peak germicidal wavelength). As water passes through the quartz sleeve inside the sterilizer housing, the high-energy light penetrates the cell walls of free-floating organisms. This exposure disrupts and mutates their cellular DNA and RNA, rendering them incapable of reproduction. An organism that cannot replicate effectively dies off, halting the spread of infection or algae blooms in your display tank.
It is important to understand that a UV sterilizer only affects organisms that pass directly through the unit's reaction chamber. Beneficial nitrifying bacteria residing within your live rock, sand bed, and bio-media remain completely safe because they do not float freely in the water column. Similarly, attached corals, macroalgae, and established sessile organisms are untouched by the UV light. This targeted action makes UV sterilization a non-chemical, highly localized form of control that fits seamlessly into existing biological and mechanical filtration setups.
The effectiveness of ultraviolet sterilization depends on three core variables: target exposure time, UV intensity, and water clarity. If your water has high turbidity or micro-bubbles, the light intensity drops rapidly. Consequently, running proper mechanical filtration—such as filter socks or fleece rollers—upstream of your UV unit ensures that the ultraviolet rays can penetrate deeply into the water column for maximum contact efficiency.
Key Benefits: Algae Control, Disease Management, and Water Clarity
Reef hobbyists utilize UV sterilizers primarily for three reasons: controlling nuisance algae blooms, suppressing parasitic outbreaks, and achieving exceptional water clarity. Understanding how UV units target different microscopic threats will help you set realistic expectations for your display tank.
For green water (floating single-celled microalgae) and certain free-floating dinoflagellates, UV sterilization is nearly instantaneous in its effectiveness. When green water passes through even a moderate-wattage sterilizer, the algal cells are destroyed quickly, clearing the tank within 24 to 48 hours. UV light also prevents bacterial blooms that can cause cloudy water, helping your system maintain that polished, visual pop that highlights delicate coral coloration.
Disease management is another major reason aquarists invest in UV units. Parasites like Cryptocaryon irritans (Marine Ich) and Amyloodinium ocellatum (Marine Velvet) have free-swimming dinospore stages in their lifecycles. When these free-swimming stages pass through the sterilizer chamber at a sufficiently low flow rate, the high UV dose neutralizes them. While a UV sterilizer is not a 100% replacement for a proper quarantine protocol, it significantly reduces pathogen loads in the water, giving your fish a higher chance of fighting off mild infections naturally.
Additionally, UV units assist in breaking down organic compounds that cause water yellowing over time. While activated carbon is often used for this purpose, continuous UV exposure breaks complex organic bonds, keeping redox potential (ORP) elevated and improving overall gas exchange in the aquarium.
Choosing the Right Flow Rate and Wattage
Selecting the right UV sterilizer requires matching the unit's wattage and flow rate to your specific goal. A common beginner mistake is running too much flow through a small sterilizer, which reduces dwell time (contact time) and renders the unit ineffective against larger, hardier organisms like protozoan parasites.
Targeting different organisms requires different UV exposure levels, measured in microwatt-seconds per square centimeter (μW·sec/cm²):
- Clarification & Free-Floating Bacteria: Requires a low UV exposure dose (around 15,000 to 30,000 μW·sec/cm²). Higher flow rates can be used for this purpose.
- Algae Bloom Control: Requires a moderate exposure dose (around 30,000 to 45,000 μW·sec/cm²).
- Protozoan Parasites (Marine Ich & Velvet): Requires a high exposure dose (70,000 to 90,000+ μW·sec/cm²). Flow must be significantly reduced to allow sufficient contact time.
To implement this effectively, always consult the manufacturer's flow chart rather than relying solely on pump ratings. For example, a 25-watt sterilizer might allow a flow rate of 400 gallons per hour (GPH) for water clarification, but require that flow to drop to 150 GPH for true parasite sterilization. Using a dedicated return pump or a valved manifold allows you to fine-tune the flow rate using a basic bucket-and-stopwatch method.
When selecting a unit size, consider your system's net water volume. For a standard 75-gallon to 120-gallon reef tank, a 25-watt to 40-watt high-output UV sterilizer offers the flexibility needed for both clarification and parasite control. Larger systems (over 200 gallons) generally require 57-watt, 80-watt, or dual-unit configurations to achieve adequate turnover rates across the system.
Compatibility, Coral Safety, and Livestock Considerations
A primary concern among beginner reef keepers is whether UV sterilizers harm delicate corals or beneficial invertebrates. When installed correctly, UV sterilizers are safe for reef aquariums, but there are important biological nuances to keep in mind regarding micro-fauna and sensitive fish species.
UV units do kill micro-plankton, copepods, amphipods, and beneficial bacteria that float through the unit. If you are actively dosing live phytoplankton or liquid coral foods, it is wise to temporarily turn off the UV sterilizer for 1 to 2 hours post-feeding to allow corals and filter feeders to ingest the nutrients. Otherwise, a portion of that live food will be destroyed as it recirculates through the sump.
Certain fish species benefit immensely from the reduced pathogen pressure that a properly sized UV sterilizer provides. For example, sensitive species prone to skin infections and parasitic outbreaks—such as the Powder Blue Tang (Acanthurus leucosternon), Achilles Tang (Acanthurus achilles), and Copperband Butterflyfish (Chelmon rostratus)—thrive in systems with low free-swimming pathogen counts. Keeping these species alongside established communities in your reef aquarium ecosystem is significantly easier when waterborne disease vectors are controlled.
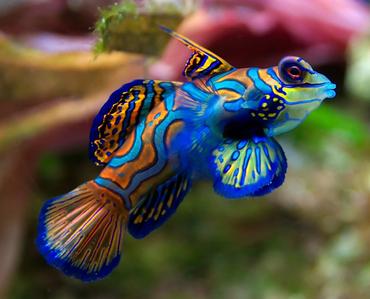
Conversely, if you keep micro-predators like the Green Mandarin Dragonet (Synchiropus splendidus) or Scooter Blenny (Synchiropus stellatus), which rely exclusively on copepods reproducing within your system, ensure your refugium is isolated or downstream from the UV intake. Positioning the UV intake inside the skimmer chamber of your sump and returning the sterilizer outflow past the refugium helps preserve copepod populations traveling into the main display.
Installation, Plumbing, and Common Beginner Mistakes
Plumbing a UV sterilizer into your reef tank setup requires careful planning to maximize efficiency and make routine maintenance straightforward. The physical placement of the unit, pump selection, and plumbing path will dictate how well the system performs over time.
Here are key guidelines to follow during installation:
- Install Downstream of Mechanical Filtration: Place the pump feed after your filter socks, fleece roller, or protein skimmer. Clean water prevents particulate matter from coating the internal quartz sleeve.
- Mount Horizontally or Vertically (Ports Up): If mounting vertically, ensure the water inlet is at the bottom and the outlet is at the top. This design prevents air bubbles from trapping inside the housing, which creates hotspots that can crack the quartz sleeve.
- Use Ball Valves and Unions: Install true double-union ball valves on both the inlet and outlet lines. This enables you to isolate the unit for sleeve cleaning or bulb replacement without draining your entire sump system.
- Avoid Excessive Heat Transfer: UV bulbs generate heat. In smaller systems or tight sumps, running high-wattage units continuously can elevate water temperature. Pair your setup with a reliable controller or monitor your temperature closely during summer months.
One of the most frequent mistakes hobbyists make is matching their UV flow rate directly to their main return pump. Standard return pumps often circulate 5x to 10x the display tank volume per hour, which is far too fast for effective protozoan sterilization. Installing a dedicated feed pump or a bypass manifold off your main return line ensures you can regulate the flow precisely without slowing down overall system circulation.
Another common mistake is neglecting bulb replacements. UV-C emissions drop steadily over time, even though the bulb continues to emit visible blue light. Most manufacturers recommend replacing the UV lamp every 9 to 12 months of continuous use to maintain effective germicidal output.
Maintenance Protocols to Preserve UV Efficiency
Even the highest-quality UV sterilizer will lose efficiency if maintenance is ignored. Over time, calcium carbonate scale, magnesium deposits, and biological films coat the external surface of the quartz sleeve. Because UV-C light cannot effectively penetrate mineral buildup, dirty sleeves drastically reduce the unit's sterilization capacity.
Establish a regular maintenance schedule every 3 to 6 months to keep your sterilizer running at peak performance:
- Isolate and Drain: Turn off the unit's power supply and close the isolation valves. Allow the bulb to cool completely for 10 to 15 minutes before handling, as hot glass can shatter under thermal stress.
- Inspect the Quartz Sleeve: Carefully remove the quartz sleeve from the outer body. Inspect it for hairline cracks, chips, or degraded silicone O-rings. Replace worn O-rings immediately to prevent water leaks into the electrical housing.
- Clean Mineral Scale with Acid Solution: Soak the quartz sleeve in warm white vinegar or a diluted citric acid solution for 20 to 30 minutes. Wipe down the glass using a soft microfiber cloth until all white calcium haze is gone. Never use abrasive pads or harsh chemical cleaners.
- Wipe Down Internal Housing: Flush the inner body of the unit with clean fresh water to remove accumulated detritus or organic sludge before reassembly.
When reassembling your UV sterilizer, apply a thin coating of food-grade silicone grease to rubber O-rings to ensure a watertight seal. Always handle the new or cleaned UV bulb with clean cloth gloves or paper towels; oil from your fingertips can create hot spots on the glass surface, leading to premature bulb failure.
Proper maintenance of your UV unit should be integrated alongside your standard tank care regimen. For additional step-by-step guides on preserving marine water quality, explore our practical resources on establishing a proper reef tank maintenance schedule and managing water parameters.
Final Takeaway: Is a UV Sterilizer Right for Your Reef?
Ultraviolet sterilizers are valuable, highly effective additions to both beginner and advanced reef aquarium setups. By reducing free-floating algae, eliminating bacterial cloudiness, and controlling troublesome parasites like Marine Ich, a UV sterilizer acts as a continuous insurance policy for your aquatic ecosystem. While it does not replace proper quarantine procedures, regular water changes, or balanced stocking habits, it provides a stable environment where sensitive corals and marine fish can thrive.
If you decide to add a UV sterilizer to your system, take the time to calculate your required flow rates, plumb the unit with maintenance accessibility in mind, and stick to a consistent cleaning schedule. Looking for more ways to optimize your marine tank setup? Browse our extensive collection of articles on reverse osmosis for saltwater tanks and advanced filtration strategies to build the ultimate marine habitat for your aquatic life!


MOST RECENT ARTICLES