HOW TO CURE YOUR LIVE ROCK BEFORE PLACING IT IN YOUR AQUARIUM

Understanding Live Rock and the Necessity of the Curing Process
To appreciate why curing is necessary, it helps to understand what live rock actually is. Live rock is not just stone; it is an ancient coral skeleton structure that has been colonized by a vast array of living organisms, including beneficial nitrifying bacteria, marine algae, sponges, worms, pods, and small invertebrates. When you purchase live rock from your local fish store or an online supplier, it is typically harvested from the ocean or wild coastal farming facilities and shipped damp wrapped in wet newspaper or plastic. During this transit period, which can last anywhere from 24 hours to several days, many of the delicate organisms residing deep inside the rock's pores inevitably die due to exposure to air, lack of circulation, and temperature swings. This organic matter begins to decompose immediately, creating a ticking chemical time bomb.
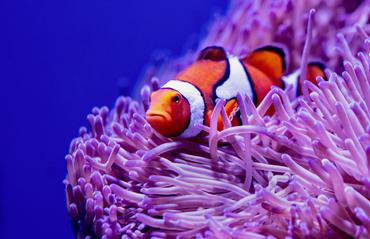
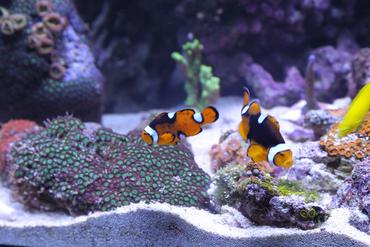
If you introduce this uncured rock straight into your main tank, the rapidly decomposing material will release massive amounts of ammonia into the water. In an established tank, this toxicity can quickly wipe out hardy fish like Green Chromis or Ocellaris Clownfish, as well as delicate corals and invertebrates. Even if you are starting a brand-new tank without fish, adding uncured rock without a plan can overwhelm the system, causing an initial surge of nutrients that fuels severe outbreaks of hair algae, cyanobacteria, and bubble algae. Curing is essentially a controlled cycling process that takes place in an isolated environment. It allows all the unavoidable die-off to run its course safely. The ammonia spikes and subsequent nitrite peaks occur away from your display aquarium, giving beneficial nitrifying bacteria the exact time they need to multiply, stabilize, and colonize the rock before it ever encounters your prized fish.
Choosing the Best Method: Dedicated Bin vs. In-Tank Curing
Hobbyists generally choose between two primary methods for curing live rock:
- Curing it externally in a separate, dedicated container
- Curing it directly inside an entirely empty, newly set up display tank
Selecting the right method depends on whether you are working with an active aquarium, your patience level, and your household space constraints.
The dedicated bin method is highly recommended by experienced reef keepers, especially those adding new rock to an established setup or trying to maintain a pristine display tank. This approach utilizes a clean, food-safe plastic container, such as a large heavy-duty storage tote or a clean plastic trash can. Because this process happens entirely separate from your main aquarium, it completely protects your existing livestock from toxic water parameters and keeps the strong, unpleasant odors of organic decomposition out of your main living room or office. Furthermore, it allows you to easily scrub the rock and vacuum out the resulting detritus without messing up your main aquarium's sandbed.
In-tank curing should only be attempted if the aquarium is completely brand new and contains absolutely no fish, corals, or invertebrates. This method allows you to cure the rock while simultaneously cycling your new aquarium's plumbing, filtration, and substrate. While it offers the convenience of only having to arrange your aquascape once, it has a significant downside: the massive amount of organic sludge, die-off, and detritus will settle deeply into your brand-new substrate. This requires intensive, meticulous gravel vacuuming and massive water changes later on to prevent long-term phosphate leaching. For a cleaner, more controlled start, many intermediate hobbyists prefer using an external bin even when setting up a brand-new system from scratch.
Step-by-Step Guide to the External Curing Process
Curing live rock in an external container is a straightforward, systematic process, but it requires diligent monitoring and the right equipment to ensure a successful outcome. Follow these practical steps to ensure your live rock is perfectly prepped, cleaned, and biologically optimized for your aquarium:
-
Prepare the Curing Container: Clean your plastic bin thoroughly with warm water (never use soaps or household chemicals). Fill the container with freshly mixed saltwater, matching the specific gravity of your main display tank, typically between 1.023 and 1.025. Place a reliable submersible aquarium heater into the bin and adjust it to maintain a stable temperature between 75 and 80 degrees Fahrenheit. Maintaining proper temperature and salinity is vital to preserve the deeply embedded beneficial bacteria and desirable hitchhikers like coralline algae.
-
Inspect and Scrub the Rock: Before placing the rock into the bin, inspect each piece carefully under good lighting. Use a clean, stiff-bristled brush (like a new toothbrush or grout brush) to gently scrub away obvious patches of dead, black, or mushy sponges, white decaying algae, and loose organic matter. This physical removal reduces the overall organic load, drastically minimizing the intensity and duration of the upcoming ammonia spike. Never use tap water for this step; instead, rinse the rock in a small bucket of mixed saltwater to avoid killing off live bacteria.
-
Provide Vigorous Water Circulation: Submerge the rock completely in the prepared curing bin. Add one or two submersible powerheads to provide strong, turbulent water movement across all pieces of rock. High circulation is absolutely critical during the curing phase because it carries vital oxygen deep into the porous structures of the rock, preventing anaerobic dead zones where foul odors and toxic hydrogen sulfide gas can form. Keep the container loosely covered to reduce water evaporation while still allowing for adequate air and oxygen exchange.
-
Perform Regular Water Changes and Detritus Removal: The water inside your curing bin will become highly toxic as organic matter breaks down. To prevent extreme ammonia levels from killing off the very beneficial nitrifying bacteria you want to save, perform a 50% water change at least once a week using freshly mixed saltwater. During the water change, use a siphon hose to thoroughly vacuum out the heavy layer of loose debris, sand, and organic sediment that accumulates at the bottom of the container.
Monitoring Water Parameters and Identifying Unwanted Pests
Knowing exactly when your live rock is fully cured requires regular water testing rather than watching the calendar. You will need a reliable marine test kit to monitor ammonia, nitrite, and nitrate levels throughout the weeks. Initially, your tests will show a major, alarming surge in ammonia, followed by a steady rise in nitrites as specialized bacteria begin processing the waste. This is a completely normal part of the nitrogen cycle.
Your live rock is officially cured when tests show both ammonia and nitrite levels have dropped back down to absolute zero, and nitrates begin to rise and stabilize. This stabilization typically takes anywhere from three to six weeks depending on how long the rock was in transit, how it was handled, and how much initial die-off occurred. If you notice a persistently foul, rotten-egg smell coming from the bin after several weeks, it indicates insufficient water flow or a massive pocket of deep decay that requires further physical scrubbing and increased water circulation.
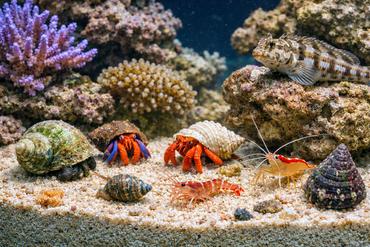
The isolated curing period is also the absolute ideal window to inspect your rock for unwanted pests before they can sneak into your main display tank. Keep a close eye on the rock at night using a flashlight to look for aggressive, invasive pests like Aiptasia anemones, majano anemones, mantis shrimp, bristle worms, and destructive gorilla crabs. It is significantly easier to treat an isolated piece of rock for Aiptasia or trap a predatory crab in a bare plastic bin than it is to extract them once they have settled into a complex, glued aquascape surrounded by delicate corals and expensive fish.
Compatibility and Long-Term Care Considerations
Once your live rock is thoroughly cured and added to your aquarium, its intricate porous structure becomes the heart of your biological filtration and a primary foraging ground for your livestock. However, the quality of your rock and how well it is cured directly impacts the health and compatibility of the species you can safely introduce down the road.
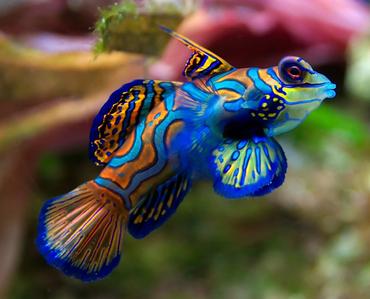
For example, certain marine fish rely heavily on mature, clean live rock for survival. The splendid mandarinfish depends almost entirely on a steady, thriving population of copepods and amphipods that reproduce within the safe, tiny crevices of cured live rock. If your rock is not properly cured and allowed to mature, these microscopic food sources will face massive initial die-offs, making it incredibly difficult to sustain delicate foragers early on. Similarly, popular grazing species like the Lawnmower Blenny or various species of Zebrasoma tangs require a clean, well-cured rock surface where healthy microalgae and film algae can establish without being choked out by the foul, toxic hair algae blooms that thrive on poorly cured rock leaking high amounts of trapped phosphates.
Maintaining your live rock over the long term requires keeping your water parameters within strict, stable marine standards. You must provide adequate calcium and alkalinity levels to promote the growth of beautiful pink, red, and purple coralline algae, which naturally seals the rock and prevents nuisance hair algae from gripping the surface. Regular water changes, running an efficient protein skimmer, and ensuring proper flow will prevent organic compounds from building up in the rock's deep pores, ensuring it functions as an efficient biological filter for many years to come.
To ensure your overall setup success, it is incredibly helpful to look at comprehensive resources. You can review our detailed guide on setting up a saltwater tank system to understand how your newly cured rock fits into your broader equipment selection and cycling timeline. If you find yourself battling high nutrient levels or ugly discoloration on your aquascape during the first few months, checking out our troubleshooting tips for the benefits of algae in saltwater tanks can help you get your system back into perfect biological balance quickly.
Common Mistakes to Avoid During the Curing Process
Even experienced hobbyists can occasionally cut corners during the setup phase, but rushing the live rock curing process always results in additional work, financial loss, and frustration later on. Awareness of these common beginner mistakes can save you significant time and protect your future livestock:
-
Curing in Total Darkness for Too Long: While keeping the curing bin dim or dark reduces initial nuisance algae growth, a complete lack of light over several weeks can accidentally kill off beneficial photosynthetic organisms and desirable, slow-growing coralline algae styles that you want to preserve.
-
Neglecting Water Changes in the Curing Container: Many beginners assume that because there are no fish in the bin, water changes are unnecessary. However, extremely high ammonia levels can become toxic to the very nitrifying bacteria you are trying to cultivate, stalling the cycle completely.
-
Skimping on Water Movement: Using an undersized, weak powerhead allows detritus to settle back into the rock pores, starving deep-seated bacteria of vital oxygen and significantly prolonging the decomposition process.
-
Rushing Rock into the Tank Based on a Timeline: Never move rock to your display tank simply because three or four weeks have passed. Always let your liquid water test kits confirm that ammonia and nitrites are completely at zero before moving day.
A Clean Start for a Thriving Reef Aquarium
Curing your live rock requires a good dose of patience and discipline, but the long-term rewards for your marine ecosystem are well worth the wait. Taking the time to properly clean, circulate, and monitor your rock ensures that you introduce a clean, highly functional biological filter into your display tank rather than a source of toxic pollutants and hidden pests. This disciplined foundation creates a safe, stable environment where your fish, corals, and invertebrates can truly thrive for years to come. For more expert advice on maintaining pristine water parameters, managing aquarium filtration, and selecting the perfect tank inhabitants, take a moment to explore our extensive library of marine aquarium articles at RateMyFishTank.com and build your hobby knowledge base today.


MOST RECENT ARTICLES